When writing software that is based on JavaEE / JakartaEE you have one big benefit: All APIs are specified and therefore your software will run on any application server 🙂
Unfortunately, real life is different. While the introduction is true for most of all use cases, there are still some pitfalls. Since all application servers like TomEE, Wildfly or Payara are developed by humans, they all have bugs. But I do not want to say that they are not usable. Too be true the big players are really stable and flexible. But sometimes you will find some behavior that is different in one application compared to others. If you write an application which is not that important you will normally run it only on a single application server. It won’t make sense to test your application on Wildfly and use TomEE in production. But if you want to develop a library or a framework that depends on the JavaEE specification and it should be usable with any application server it really makes sense to test your code as often as you can. This post will give you an overview how you can achieve this goal by using Docker.
How to write tests for an enterprise library
Let’s assume you develop a library that adds Server Timing information to HTTP responses. Server Timing is a new W3C features that allows you to add some metrics about the request handling to the response. The following image shows how such information would be rendered in the developer console of Chrome:
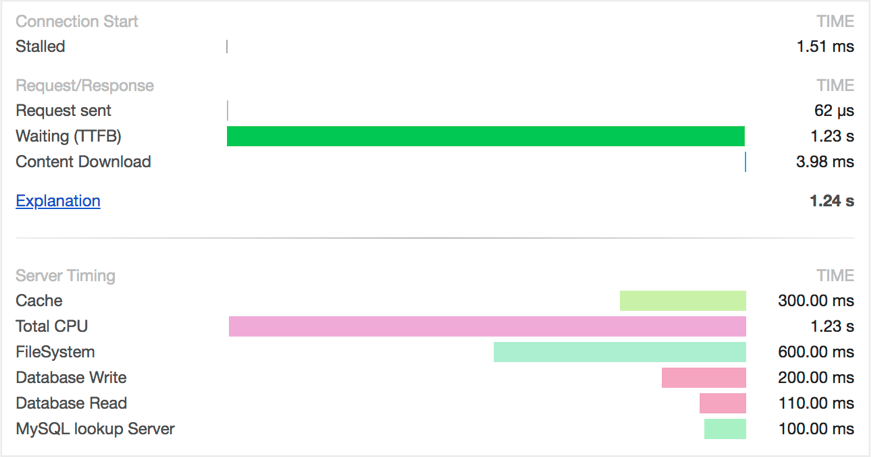
When developing such a feature for JavaEE, an implementation of the javax.servlet.Filter interface is a good choice.
In our library we could provide the following class:
package com.karakun.enterprise;

import javax.servlet.Filter;
import javax.servlet.FilterChain;
import javax.servlet.FilterConfig;
import javax.servlet.ServletException;
import javax.servlet.ServletRequest;
import javax.servlet.ServletResponse;

public class ServerTimingFilter implements Filter {

    @Override
    public void init(final FilterConfig filterConfig) {}

    @Override
    public void doFilter(final ServletRequest request, final ServletResponse response, final FilterChain chain) {
        chain.doFilter(request, response);
        ServerTiming.writeTiming(response);
    }

    @Override
    public void destroy() {}
}
As you see, we call the static ServerTiming.writeTiming() method in our filter.
This methods adds some headers to the HTTP response which is represented by the ServletResponse instance that is passed to the method.
Even if this method is using APIs from the JavaEE specifications (the ServletResponse interface that is part of the servlet specification)
we can easily provide some unit tests to check the functionality of the method.
A test method could look like this:
@Test
public void testServerTiming() {
    final ServletResponse response = new ResponseMock();
    ServerTiming.addTiming("Call DB", 3450);
    ServerTiming.writeTiming(response);
    assertTrue(response.containsTiming("Call DB", 3450));
}
Thus, we can easily test that all information is added to the response and our Server Timing implementation is working. If you want to see how the Server Timing feature can be implemented in detail you can find an implementation as part of our open source product Rico.
One thing that we cannot test is the usage of the javax.servlet.Filter.
Such a filter can be added to a servlet context and then mutate every response for a defined endpoint.
If you want to add the filtering to all requests that a server application receives you can add the
javax.servlet.annotation.WebFilter annotation to your class or do the registration in code like it is shown in the following snippet:
final Filter filter = new ServerTimingFilter(true);
final FilterRegistration.Dynamic createdFilter = servletContext.addFilter("ServerTiming", filter);
createdFilter.addMappingForUrlPatterns(EnumSet.allOf(DispatcherType.class), true, "/*");
To check that the code snippet is working and your custom filter will really be called for each and every request you need to test your library with an application server.
Since your library will be used in several applications in the near future it is important to test it with all application servers (and releases) that are used by your customers.
The given example will easily work on every application server since it only uses some common and well tested features of the servlet API. Since the main focus of this article should be the workflow to provide integration tests, the example is kept as simple as possible.
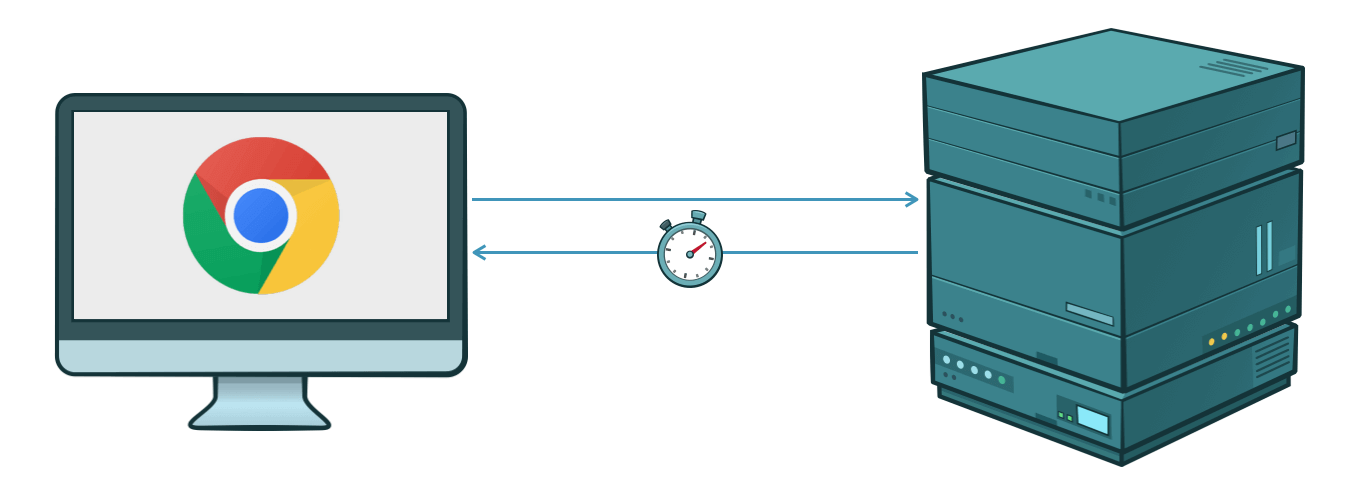
Let’s assume you need to check that your library is running fine on TomEE and Payara. You can easily install local instances of the application servers on your machine, deploy a test application that internally uses your library and open some endpoints in your browser. You can then check if you really see the Server Timing information in the developer view of your browser.
While the described workflow is fine for a first test you do not want to do this after every change in the source code of the library. After the first 3 tests you probably know that you need to automate the workflow in some way. Plus, your team members maybe do not know how you do the tests and push code changes without checking the functionality on TomEE.
Integration tests with Docker
Since we want to test the integration of our library in specific application servers, integration tests are the solution to our problem. To test this automatically after every code change or with every build we need to automate the following steps:
- Build the library
- Build a sample application that uses the library
- Install a Payara
- Install a TomEE
- Configure Payara and TomEE to use different ports on the local machine
- Deploy the sample app in Payara and TomEE
- Trigger some Endpoints
- Check the response
Let’s start with the most simple part which can be done 100% in Java:
Writing a test that triggers endpoints and checks the response.
TestNG’s data provider functionality can be used to write a test which calls multiple server instances.
We can provide a list of configurations for our tests.
The following snippet contains a method that is annotated with the org.testng.annotations.DataProvider annotation
and provides the configurations for our tests:
@DataProvider(name = "endpoints")
public Object[][] getEndpoints() {
return new Object[][]{
new Object[]{"TomEE", "8080"},
new Object[]{"Payara", "8081"}
};
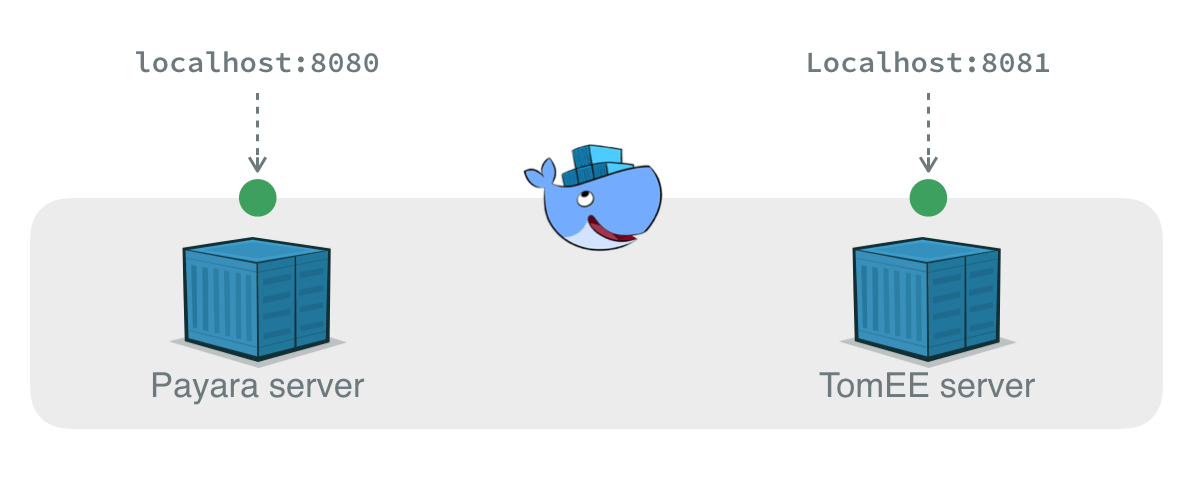
}The method provides the configuration for 2 endpoints (TomEE on port 8080 and Payara on port 8081).
This configurations can now be used in a test method:
@Test(dataProvider =  "endpoints")
public void testEndpoints(String containerType, String port) {
    print("Testing " + containerType);
    final String url = "http://localhost:" + port + "/test";
    final Map<String, Long> timings = callEndpoint(url);
    assertContains(timings, "Call DB", 3450);
}
By executing the test, TestNG will automatically call it once for every given configuration. At the moment the tests will fail since we do not have any applications running or maybe an application is not even deployed.
To automatically bootstrap an application server with our test application we will use Docker. I will not describe the functionality of Docker since this would be beyond the scope of this article.
Adam Bien provides some good Docker containers for JavaEE application servers that can be used as a base for our containers. You can find all needed Docker files at Github. For our sample, we will use these container descriptions as a base and extend them with the needed functionality. For TomEE, our Docker file will look like this:
FROM airhacks/tomee:7.0.4-plus
MAINTAINER Hendrik Ebbers, karakun.com
COPY sample.war ${DEPLOYMENT_DIR}
The DEPLOYMENT_DIR variable is already defined in the Docker file from Adam and we can easily use it to add our application
(the sample.war) to the TomEE instance that is running in the Docker container.
The only important point is that the war is in the same folder as the Docker file when you build the image file.
When starting the container by hand you can easily map the internal port of the application server (8080) to any free port of your
local system by adding a port mapping:
docker run -p 8080:8080After starting the containers in Docker we need to wait until the containers are started and the internal application is deployed. To do so we can write a small Java method that for example checks if a health-endpoint of the app can be reached.
Since we want to access the Docker containers for each test run they must be started automatically before the tests and shut down after
the tests. In TestNG we can use the @BeforeClass and @AfterClass (or @BeforeGroup and @AfterGroup) annotations to execute good
before running the tests after and all tests are executed. Since we can start native progresses in Java a first implementation to run
our integration tests the following code gives an idea how such functionality can be implemented in Java:
public class DockerBasedTest() {

    @BeforeClass
    public void init() {
        Runtime.getRuntime().exec("cd docker/tomee && docker run -p 8080:8080 -n TomEE");
        Runtime.getRuntime().exec("cd docker/tomee && docker run -p 8080:8081 -n Payara");
        Helper.WaitTillPortsAvailable(8080, 8081);
    }

    @DataProvider(name = "endpoints")
    public Object[][] getEndpoints() {
        return new Object[][]{
                new Object[]{"TomEE", "8080"},
                new Object[]{"Payara", "8081"}
        };
    }

    @Test(dataProvider =  "endpoints")
    public void testEndpoints(String containerType, String port) {
        print("Testing " + containerType);
        final String url = "http://localhost:" + port + "/test";
        final Map<String, Long> timings = callEndpoint(url);
        assertContains(timings, "Call DB", 3450);
    }

    @AfterClass
    public void destroy() {
        Runtime.getRuntime().exec("docker stop TomEE");
        Runtime.getRuntime().exec("docker stop Payara");
    }
}
With this class, we already defined a full workflow to test the internals of the sample app on several application servers. The following diagramms gives an overview of the implemented steps:
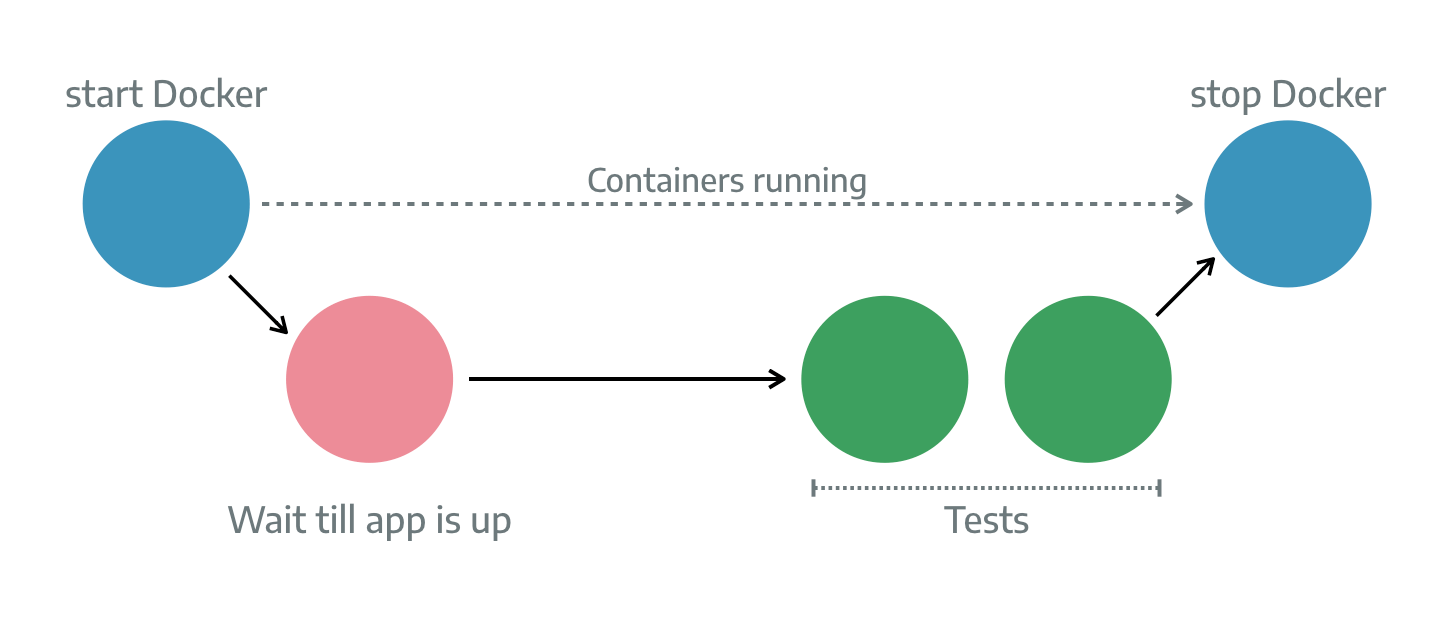
By starting any test of the given test class the needed Docker containers will automatically be created and destroyed after the test was executed. To be true, you do not want to write the Docker commands in every test class. Here you can create your own custom abstraction or use a library that provides such functionality.
The future is testcontainers.org
From my point of view testcontainers is a very good library to implement such workflows today. The library contains APIs to create unit tests that need Docker containers at runtime. At the moment the library is limited to JUnit support and therefore TestNG is not supported.
The testcontainers library uses the rule support of JUnit to define Docker containers that should be automatically be created for unit tests. The library provides a pretty good API that lets you easily define containers. The following example shows how a container with a Redis instance can be defined for unit tests:
@ClassRule
public static GenericContainer redis =
    new GenericContainer("redis:3.0.2")
               .withExposedPorts(6379);
Additionally, testcontainers provides support for Docker Compose. With this, you can easily create a container landscape for tests. All containers that are needed for your tests can be defined in a yml file that Docker Compose will use to start several Docker containers. The following snippet shows how Docker Compose can be used with testcontainers:
@ClassRule
public static DockerComposeContainer environment =
    new DockerComposeContainer(new File("src/test/resources/compose-test.yml"));
From my point of view the biggest limitation of testcontainer is that you can only use it with JUnit at the moment. If your tests are based on TestNG for example you cannot easily integrate it in your project. In this case, you need to create your own minimal API to bootsrap Docker containers as described before. We already talked with the maintainers of testcontainers and the project is aware of this issue and will work on it in future. If you want to see a more concrete example that uses Docker for integration and unit tests in TestNG you can have a look at the integration tests of Rico. We use Docker to test our server and client API with 3 different application server types automatically.
Conclusion
To be true there are still some pitfalls if you want to integrate Docker based containers in your test suite and run unit and integration tests against services that are provided by Docker containers. If you use JUnit in your tests you should have a deeper look at testcontainers and contribute to this project if some points are missing for your use cases. But even if you use a different test framework the hints and descriptions in this article should help you to create your own custom API to boot Docker containers for unit tests.
Once you have the first tests running the integration to other tests and the definition of new tests is quite easy. Plus, most CI pipelines already offer Docker support. Maybe you need to install Docker and Docker Compose on your build nodes but that should not be a real problem.
As already said we use this approach for Rico and are really happy with the outcome. New tests that need external services can be created easily and we can test our complete API automatically on different environments. Since tools like Travis CI already offer support for Docker we can even run all the integration tests of our open source platform without any cost in the cloud.
 Hendrik Ebbers is a co-founder of Karakun AG and worked with us until 2022. He lives in Dortmund, Germany, and is the founder and leader of the Java User Group Dortmund. He gives talks and presentations in user groups and conferences. His JavaFX book "Mastering JavaFX 8 Controls" was released 2014 by Oracle press. Hendrik is JavaOne Rockstar, JSR expert group member and Java Champion.